Earlier today I taught four Illustrator techniques. Type on a Path. Envelope Distort with Warp. Shape Above. And how to outline a thick stroke so you can stroke the resulting path. I built the demo live, talking the whole time, the way I always do.
Then class ended and the explanation went with it. The file is still on my drive; files are easy to keep. What does not survive is the part that mattered — the order I did things in, why I reached for one tool instead of another, the aside I made when it nearly went wrong. What I posted afterward was a PDF of the finished steps, which is a thin shadow of the demo itself.
That happens constantly, to every instructor who teaches software. The best explanation you ever give of a technique is the one you improvise at the whiteboard or on the projector, and it exists for exactly as long as the people in the room remember it.
The fix is embarrassingly simple
Record the demo. Not a produced tutorial with a script and a clean take — just the live demo, screen and voice, while you do the thing you were going to do anyway. Then let software turn the recording into text and stills, and do the editorial work on top of that.
The demo below took four minutes and thirty seconds. Here is what turned it into a published page.
| Capture | OBS Studio — screen at 1920×1080, Apple’s hardware H.264 encoder so the recording costs almost nothing in CPU while Illustrator is running. Audio from a RØDE Wireless ME, with the microphone pinned to the scene rather than set globally, so the audio source follows whichever scene I’m in. |
|---|---|
| Transcription | whisper.cpp running large-v3-turbo locally on Apple Silicon,
about nine times faster than real time. Primed with a short glossary of Illustrator and
typography terms, which is why it produced “leading,” “Pathfinder,”
“Hard Mix” and “Cmd+D” rather than the mush these models usually return
for domain vocabulary. Nothing was uploaded anywhere to transcribe it. |
| Stills | ffmpeg pulling single full-resolution frames at chosen timestamps. |
| Writing | Claude reading the timestamped transcript, deciding which moments were steps, drafting the instructions, and writing the alt text. |
| Publishing | The Canvas REST API — uploading the images and creating the page directly. Nobody opened the Rich Content Editor. |
- Recording length
- 4 min 30 sec
- Source file
- 15.5 MB
- Transcription time
- about 30 seconds
- Words of transcript
- 468
- Stills extracted
- 12, of which 4 were used
What came out
This is the finished Canvas page, reproduced here in Canvas’s own typography. It covers the part of building a CMY Venn diagram that students actually get stuck on: placing three circles at exactly 120 degrees without eyeballing it.
Facsimile — ART 159, Digital Imaging
Getting the Three Circles Exactly Right
The finished piece is three overlapping circles in yellow, cyan and magenta. This page covers the fiddly part: spacing them evenly without eyeballing it.
Start from the center
- Cmd+R brings up the rulers. Drag a guide out and it snaps to the center of the page.
- Press L for the Ellipse tool. Hold Option and Shift and drag from that center point. Option draws outward from where you started; Shift keeps it a circle.
- Take the stroke off. Set the fill to CMYK yellow, which is C0 M0 Y100 K0.
Find the point everything rotates around
The three circles need to sit 120 degrees apart around a point halfway between the center and the edge. You can find that point without doing any math.
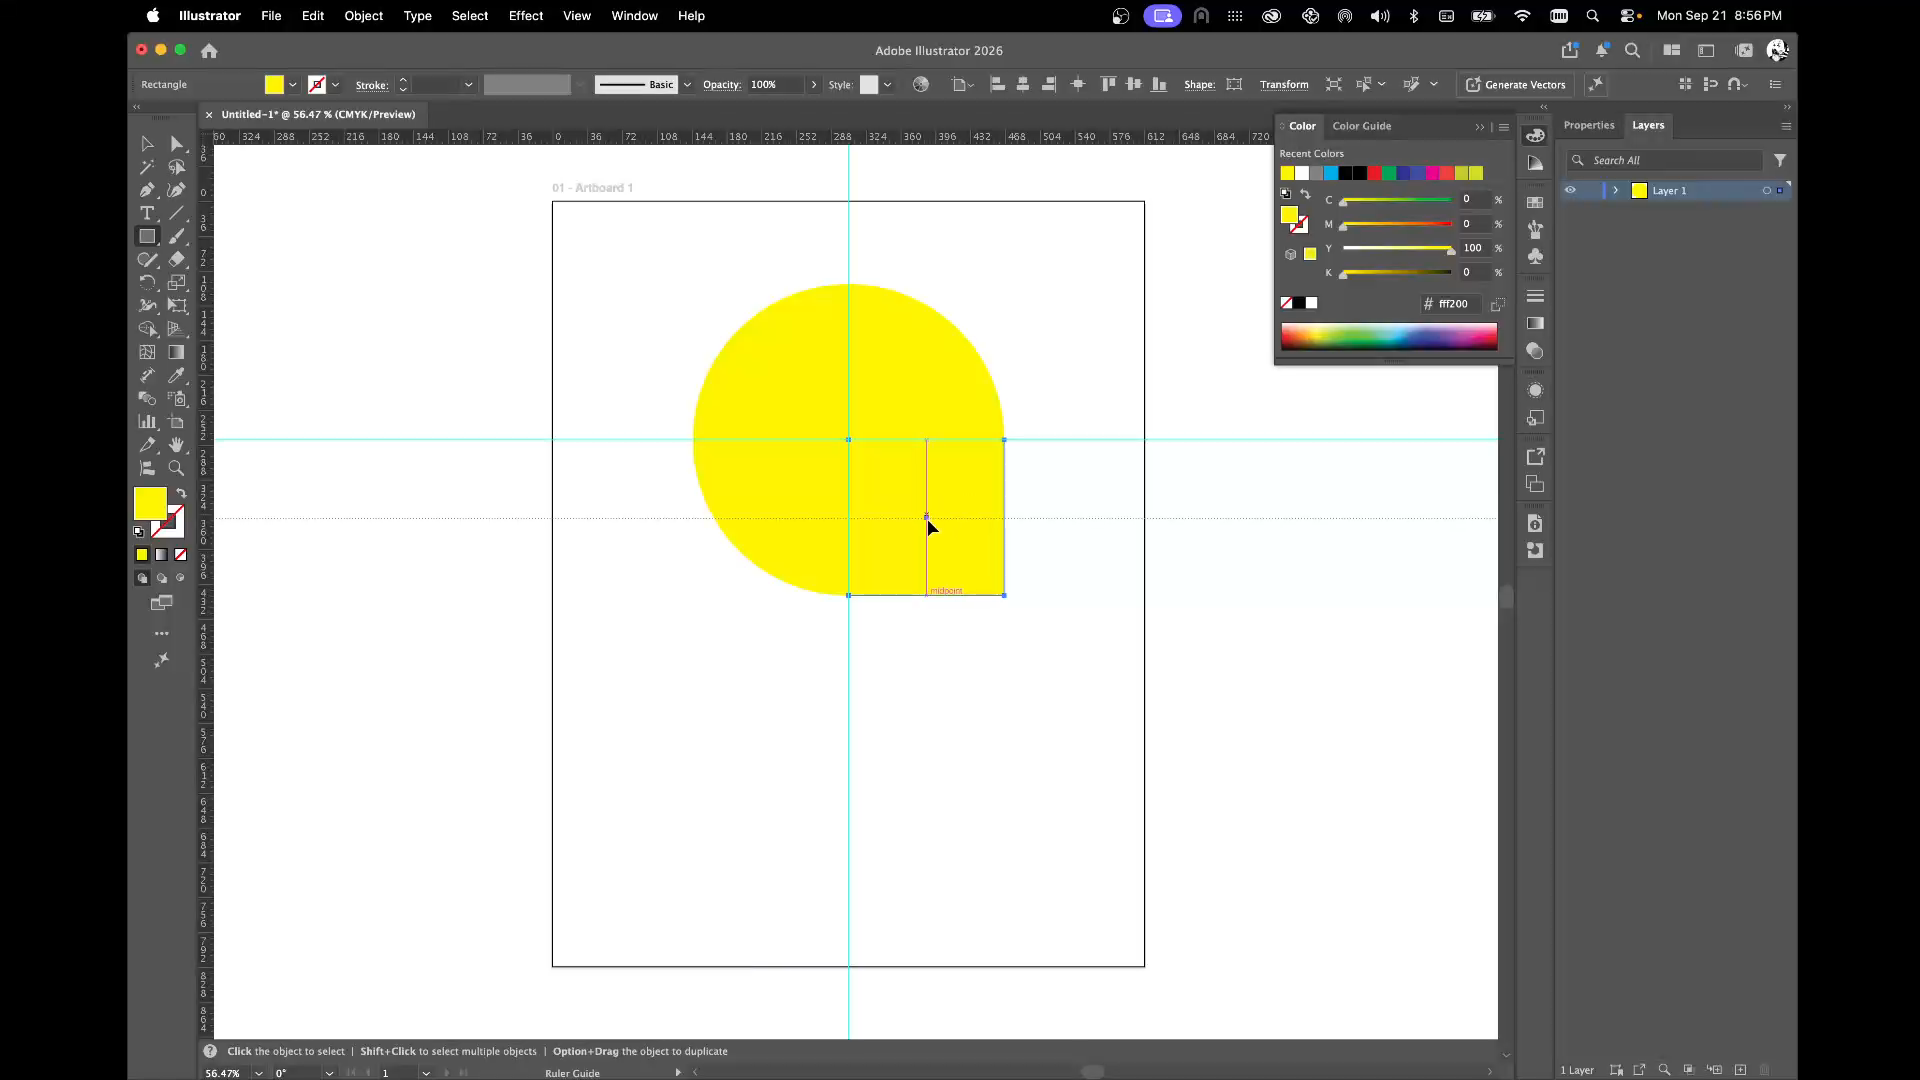
- Switch to the Rectangle tool. Drag from the circle’s center out to its right edge. That rectangle is exactly one radius wide.
- Smart guides will label the midpoint of its edge. That midpoint is half the radius, and it is what you rotate around.
Rotate and copy
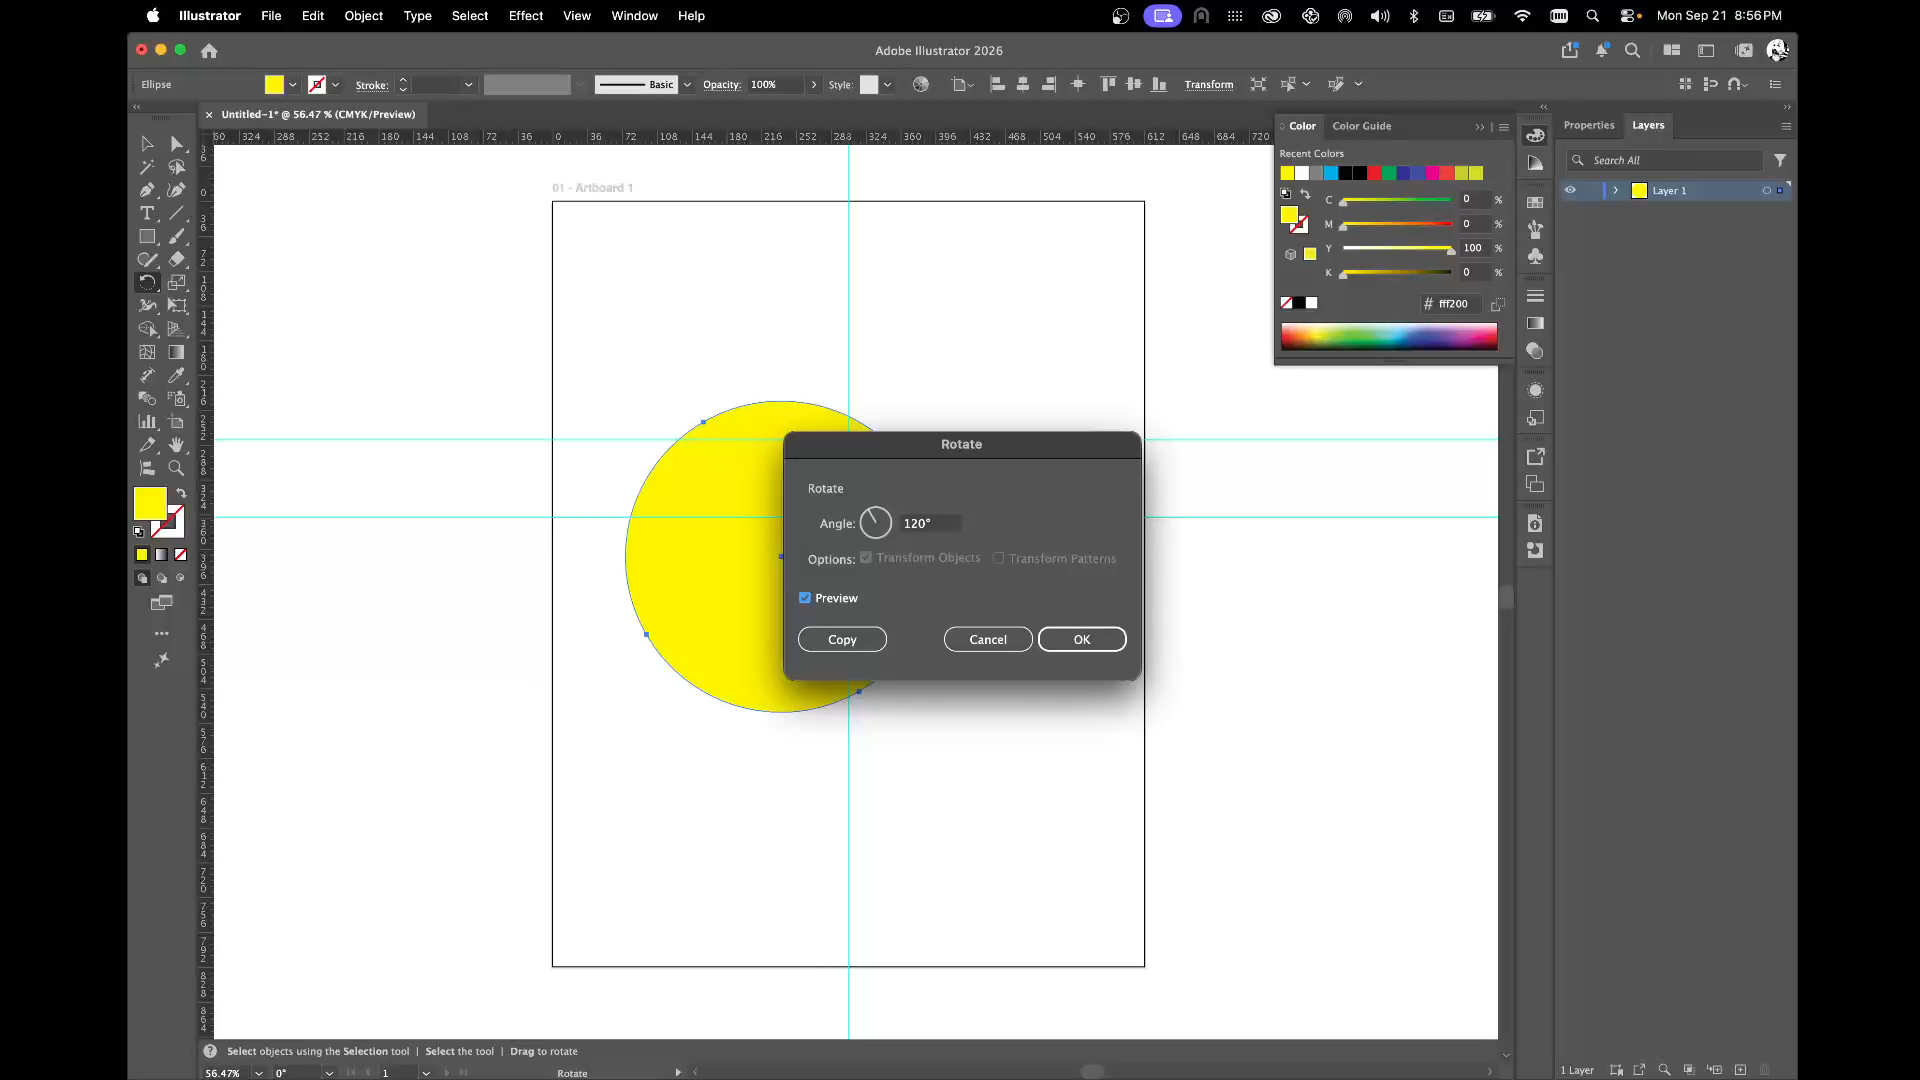
- Press R for the Rotate tool.
- Hold Option and click that midpoint. Option-clicking sets the rotation origin and opens the dialog in one move.
- 360 divided by 3 is 120. Type that in the Angle field.
- Click Copy, not OK.
- Cmd+D repeats the last transform. Press it once and the third circle lands in place.
Color them, then combine
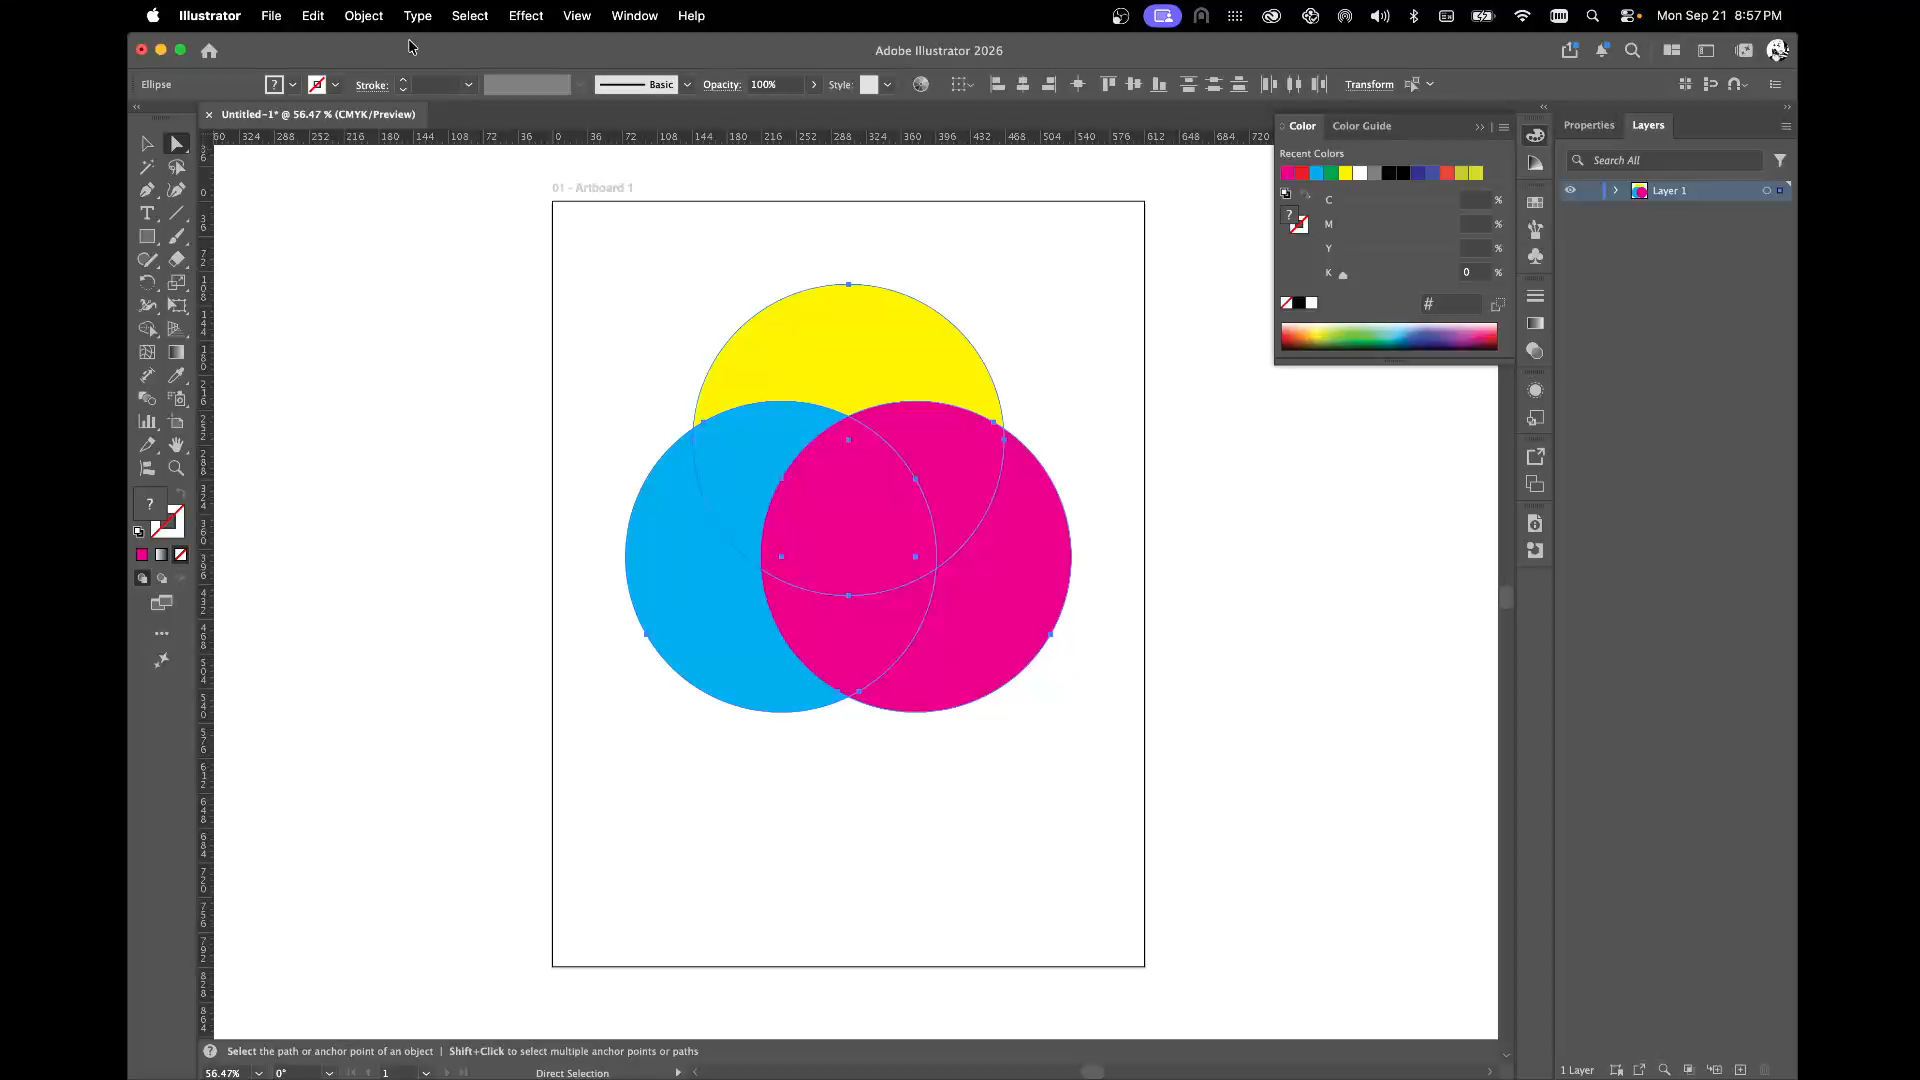
- Color the other two circles cyan and magenta.
- Cmd+semicolon hides the guides so you can see what you have.
- Select all three and group them: Object > Group, or Cmd+G. Hard Mix only works on a group. Skip this and the effect does nothing.
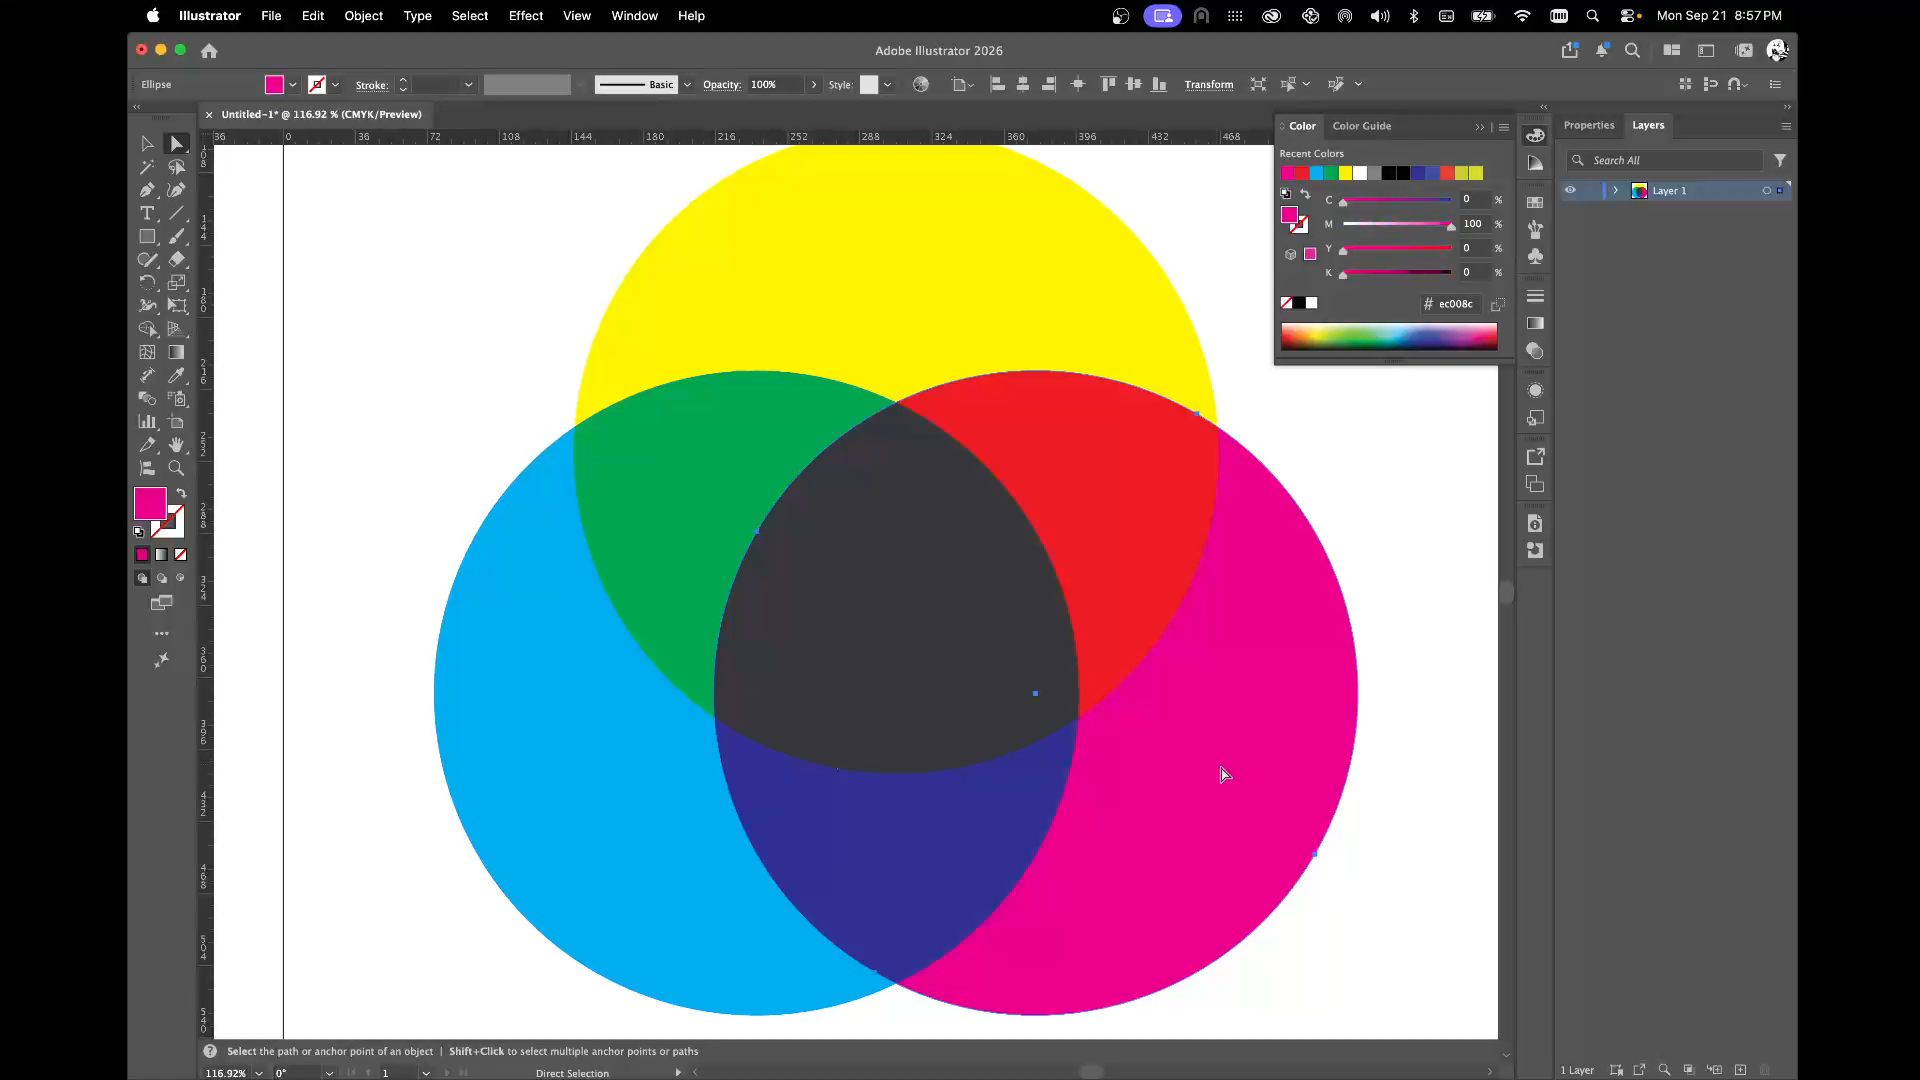
- With the group selected, choose Effect > Pathfinder > Hard Mix.
Why Copy instead of OK
OK rotates the circle you already have and leaves you with one circle in a new place. Copy leaves the original where it is and rotates a duplicate, so you end up with two. That is the difference between building a wheel and just spinning a circle.
Abridged. The published page also covers what the finished overlaps should look like and why the center is not yet rich black.
What the machine did not do
This is the part worth dwelling on, because it is where the honest limit sits.
Twelve frames came out of the recording. Four made it into the page. One of the rejects is instructive:
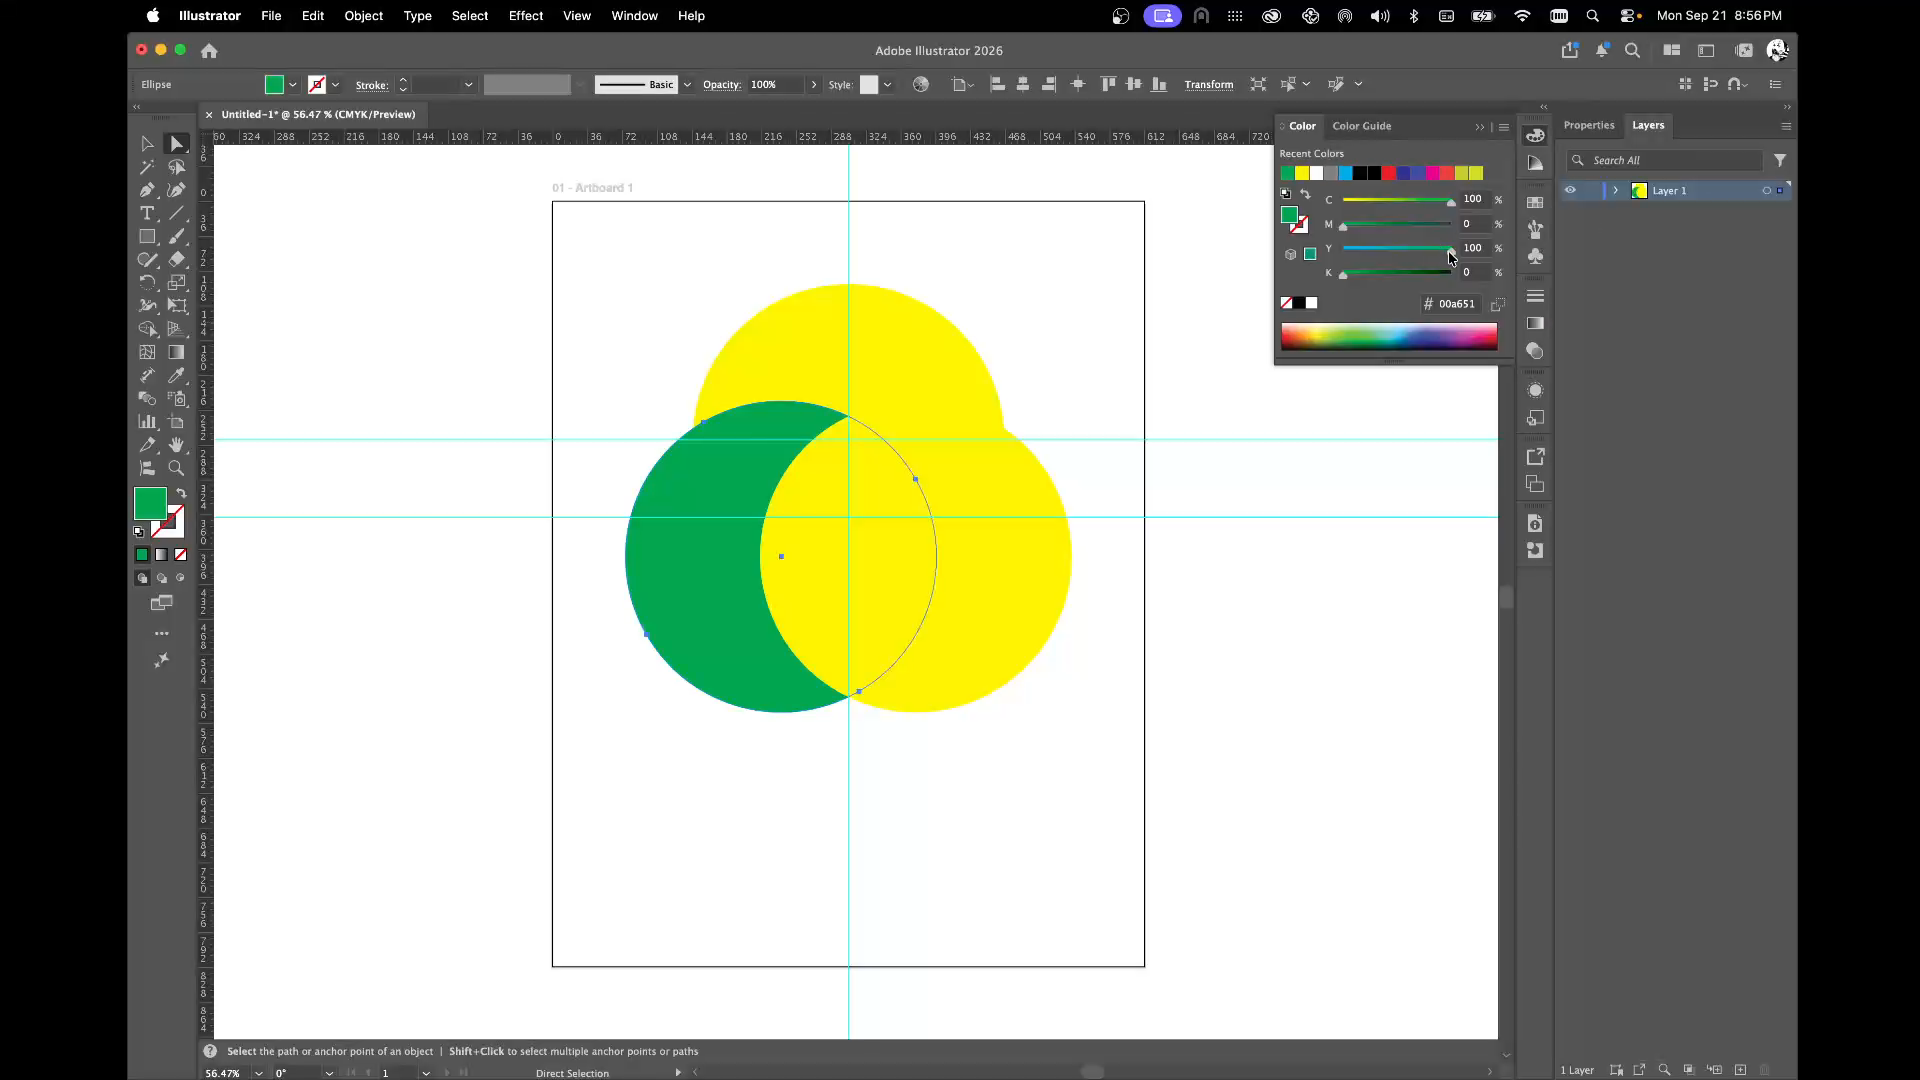
Nothing in the transcript flags that. The words at that moment were fine. Catching it required looking at the picture and asking whether it showed what the sentence claimed — which is editorial judgment, not transcription.
The same pass cut the false starts, the muttering, and a stretch where I was wrestling with the color sliders and said so out loud. Students do not need to watch me lose an argument with a gradient.
So the honest framing is this. The tooling removes transcription, screenshotting and formatting, which is most of the tedium. It does not remove deciding what is worth teaching, or checking that a picture shows what the words say. If anything, it makes that judgment more important, because the raw material arrives much faster than it used to.
Why this changes how I build a course
The economics are different when capture is free. A produced tutorial has to earn its production cost, so you only make them for things you will teach many times. A captured demo costs nothing beyond pressing record, so it is worth capturing everything and deciding later what deserves to become a page.
It also fixes a specific problem I have complained about for years. My students have told me, repeatedly and in writing, that a tutorial written out in Canvas with a walkthrough alongside it is easier to work through than a canned vendor tutorial. I agree with them. The reason I have not built more of those is that they take real time to produce. This makes them a byproduct of teaching rather than a separate project.
The demo still happened once, live, the way it always does. The difference is that this time it left something behind that a student can actually work through.