Before running a laser job, you need to correctly position your material on the workbed and focus the laser for accurate and clean cutting or engraving. This module walks you through these essential preparation steps.
Load and Position Your Material
Place your material flat on the honeycomb or knife-blade bed. Use the rulers along the edge of the machine or a material jig to align your workpiece square to the gantry. Ensure the material is not bowed or warped and is well-supported across its surface.
The origin for the laser cutter is the top right corner. This is the "home" position for the laser head. You should get in the habit of placing your material so the top left corner is close to the origin of the laser cutter.
⚠️ CAUTION
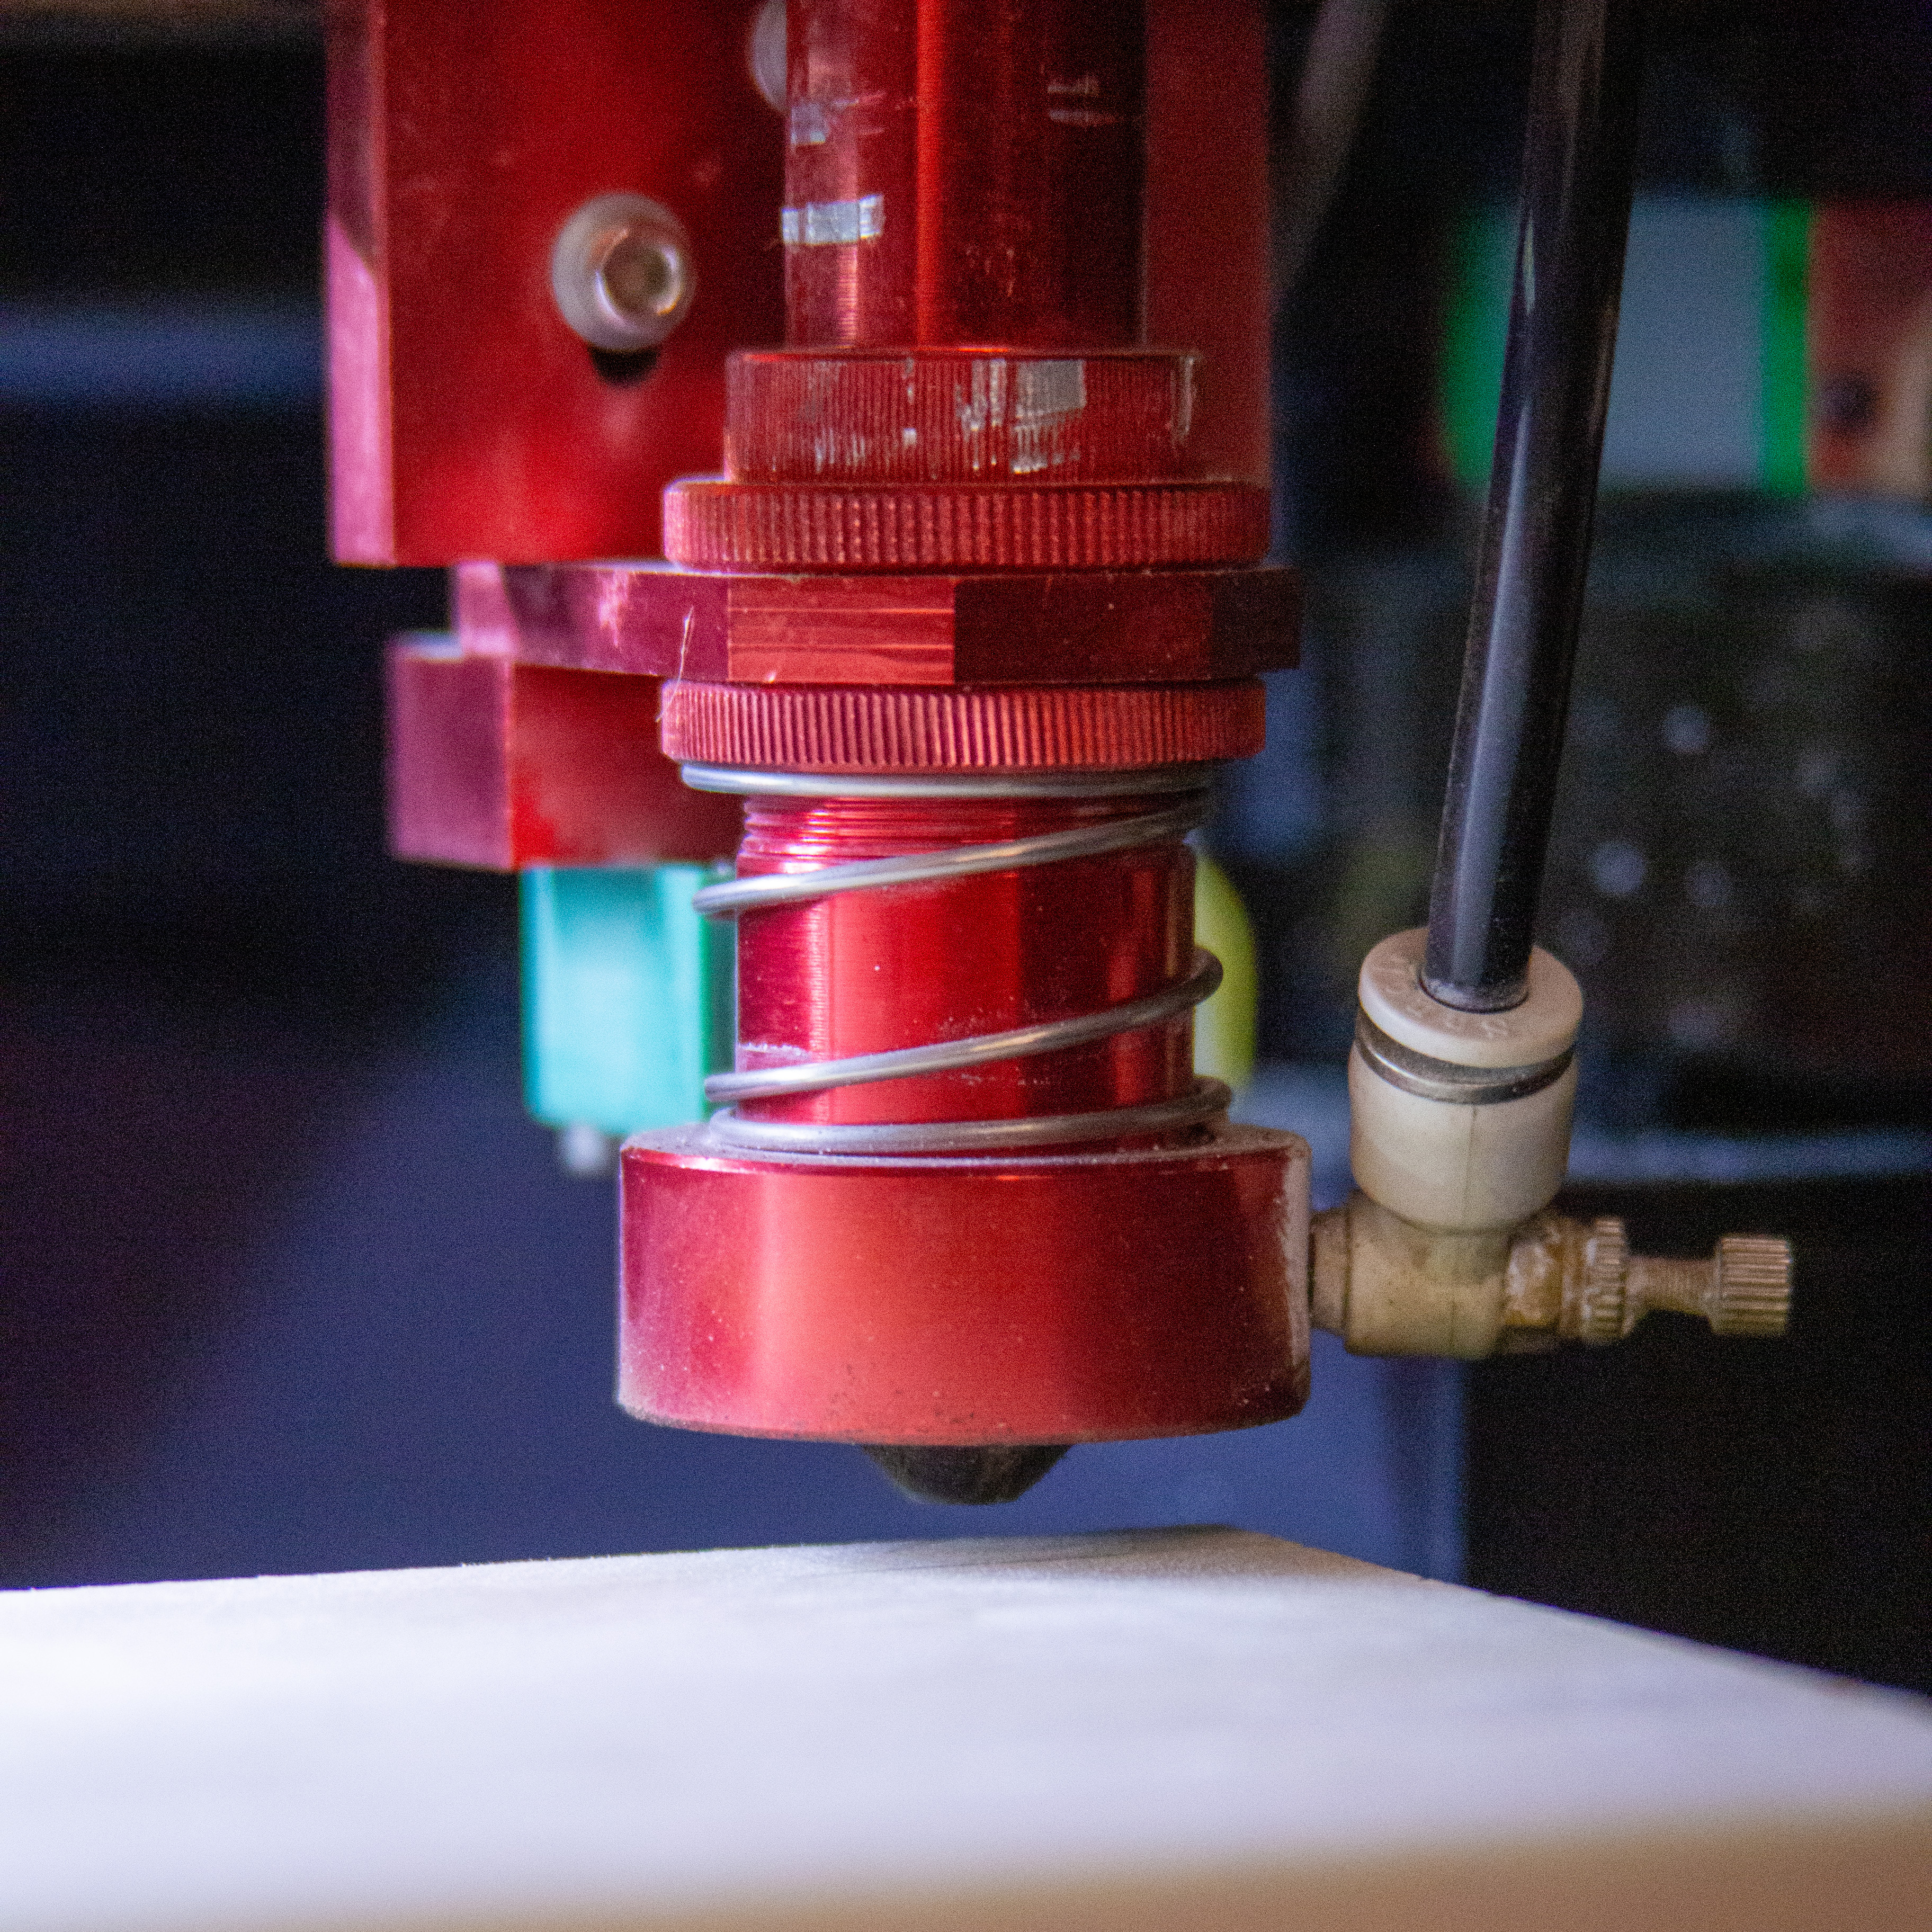
Before using the control panel to move the laser head over your material to focus, check that the laser head clears the thickness of your material. If there isn't enough clearance to move the laser head over your material, use the Manual control panel to lower the workbed with Z-.
Moving the laser head without clearance can damage the lens or your material
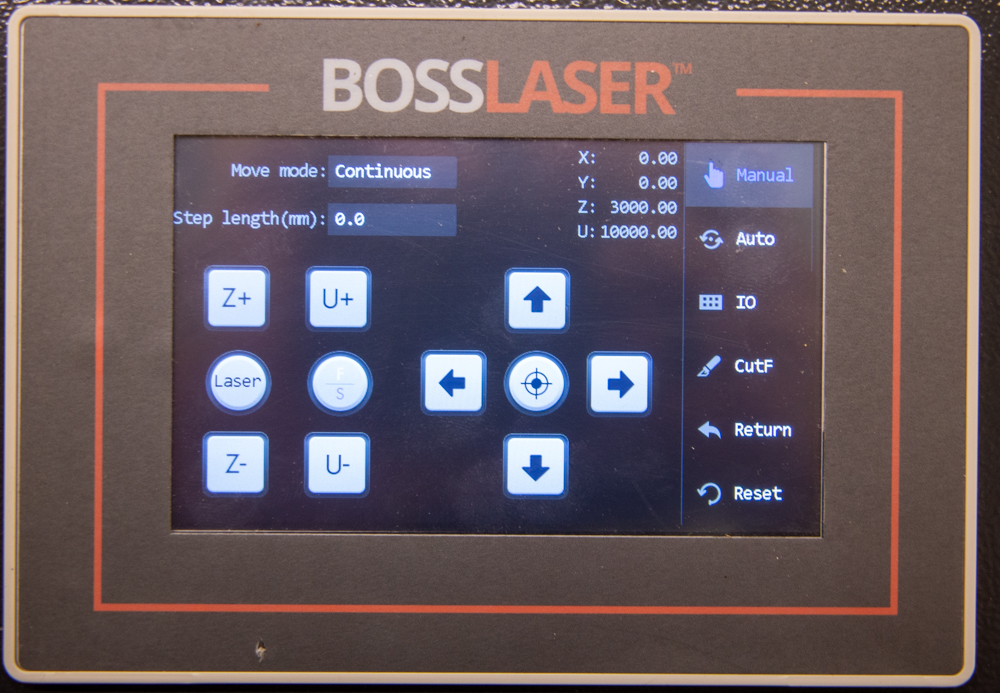
Z+ / Z- Controls on the Panel
Clearance Between Laser Head and Material
Focus the Laser
Focusing the laser ensures the beam converges sharply at the material surface for optimal precision. Follow these steps on the LS-2440 control panel to perform an automatic focus:
Select Manual on the control panel to enable X/Y movement.
Use the arrow keys to move the laser head directly above your material.
Switch back to Auto.
Press Focus.
Confirm when prompted by the control panel dialog.
For a visual walkthrough of this process, watch the video below:
Once your material is placed and the laser is focused, you’re ready to load your design in LightBurn and begin framing your job for accuracy.